PROBE SELECTION GUIDE
Using the correct probe for the specific test procedure is very critical to get the optimum test results. Most codes will specify the type, size, frequency of the probe to be used however this document gives you a brief overview of the aspects behind those requirements for your understanding.
Types of Probes:
Broadly the most common probes available can be classified as Normal Beam & Angle beam based on the sound beam path direction. They are further sub referenced as Single Crystal or Dual Crystal (there are other types which are not commonly used) & finally if they will be immersed in liquid media, they are further categorized as Immersion probes.
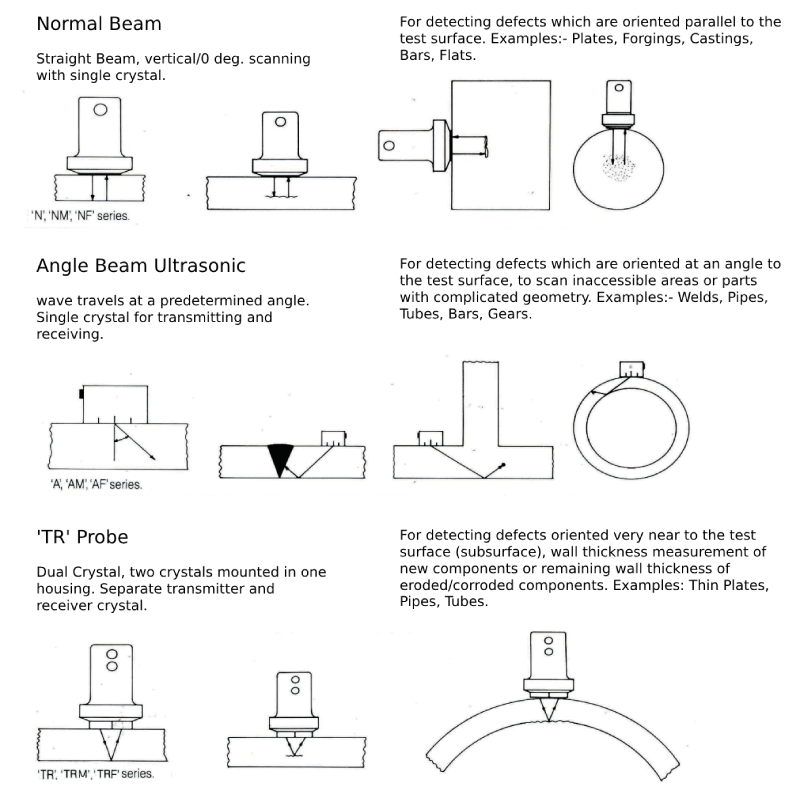
Normal Beam
Straight Beam, vertical/0 deg. scanning with single crystal.
For detecting defects which are oriented parallel to the test surface. Examples:- Plates, Forgings, Castings, Bars, Flats.
Angle Beam Ultrasonic
wave travels at a predetermined angle. Single crystal for transmitting and receiving.
For detecting defects which are oriented at an angle to the test surface, to scan inaccessible areas or parts with complicated geometry. Examples:- Welds, Pipes, Tubes, Bars, Gears.
TR’ Probe
Dual Crystal, two crystals mounted in one housing. Separate transmitter and receiver crystal.
For detecting defects oriented very near to the test surface (subsurface), wall thickness measurement of new components or remaining wall thickness of eroded/corroded components. Examples: Thin Plates, Pipes, Tubes.

Application:
Different test requirements may need another probe, one probe will not meet all the requirements. For example, the probe for testing thick materials will be a different from one that is used for thinner test jobs. A probe used for weld testing is a lot different one than one used for thickness gauging or testing a steel bar. It is quite likely one may need to use a combination of different probes for a specific test task. Using the right probe is the first step to ensure correct analysis using ultrasonic ndt technique.
1) First step:
Primarily you need to consider the Material grain structure/composition & the Type/orientation/location of the expected defects.
2) Other Factors:
- Frequency of the probe (see table for a detailed explanation)
- Crystal size (larger crystal better is the gain reserve, better penetration) -Geometry of the test job (shape & size of the job)
- Temperature & surface condition of the test job (probe with soft or hard face, ambient/high temperature probe design)
PROBE FREQUENCY SELECTION
_(2).jpg)
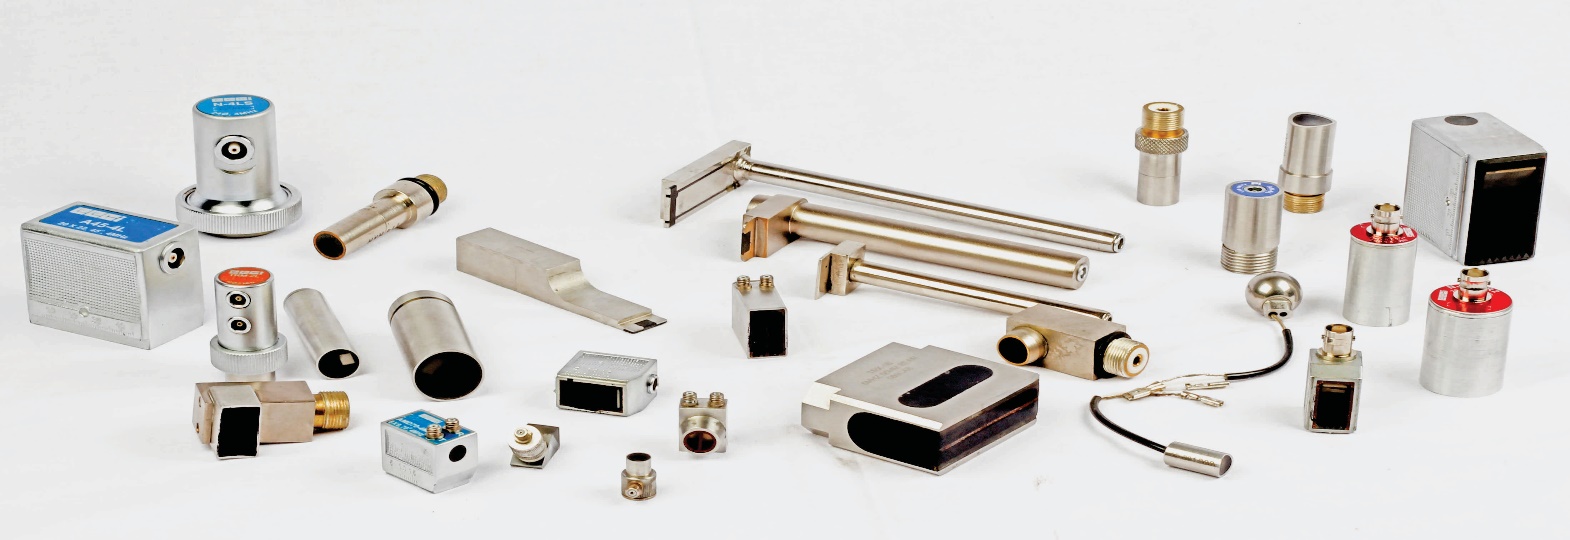
EECI offers wide range of transducers for various applications such as Flaw Detection, Thickness Gauging & Material Research.

Our Probe Range includes:
Transducers are manufactured in sub miniature, miniature, normal & large Crystal size, to suit the component shape & test requirements. A wide range of frequency & size of crystal is available.
|


_(2).jpg)
.jpg)
